# Estimation and Team speed (quotas)
Filling out an estimation for each task can feel overwhelming, but the benefit is worse than the time spent.
If you fill each task estimation, it will help you to:
- always see the estimated days for any task, task type, sequence, asset type, entity, etc.
- With estimation and timesheet, you can compare estimation vs reality
- Once a task is filled with estimation, start, and due date, you will be able to adjust it from the entity schedule or the team schedule
- Help your artists get better organized and be self-aware of the time they should spend on a task.
- Better forecast your production and the next!
# Add an Estimation for a Task
Click on the name of a task type.
The new page is the Detailed Task Type view. It provides more detailed information about this specific task type.
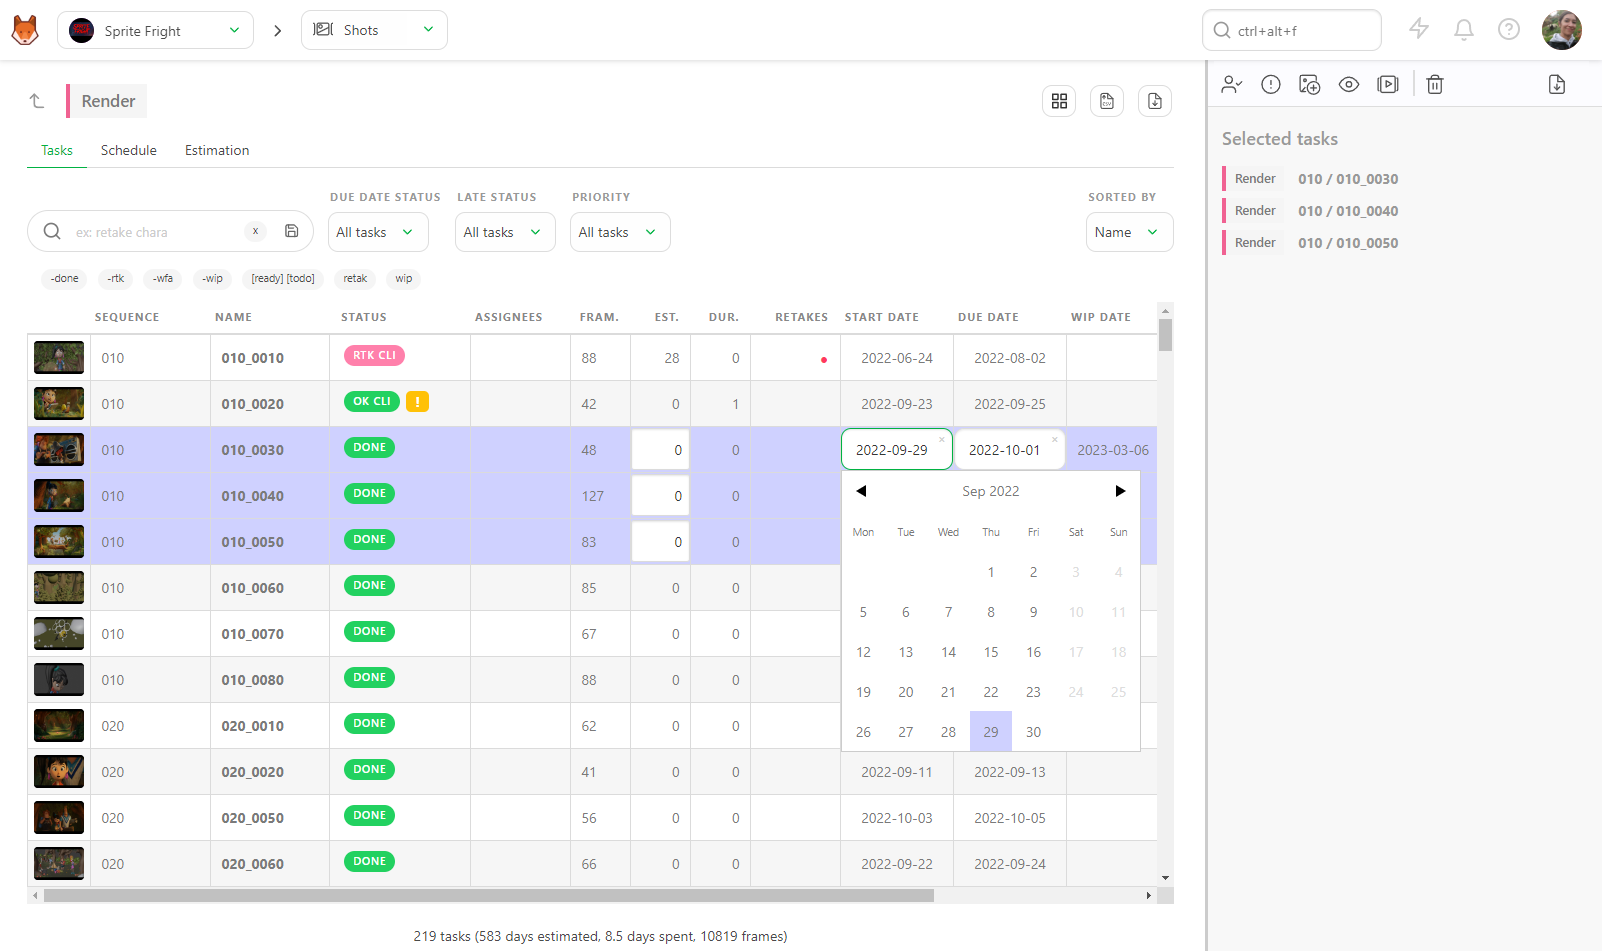
To add an estimation to a task, click on the line and type the number of days you estimate. You can select multiple assets or shots at the same time.
You can also define a Start date by clicking on it. A calendar will open and let you choose your start date.
The Due date is automatically calculated with the Estimation.
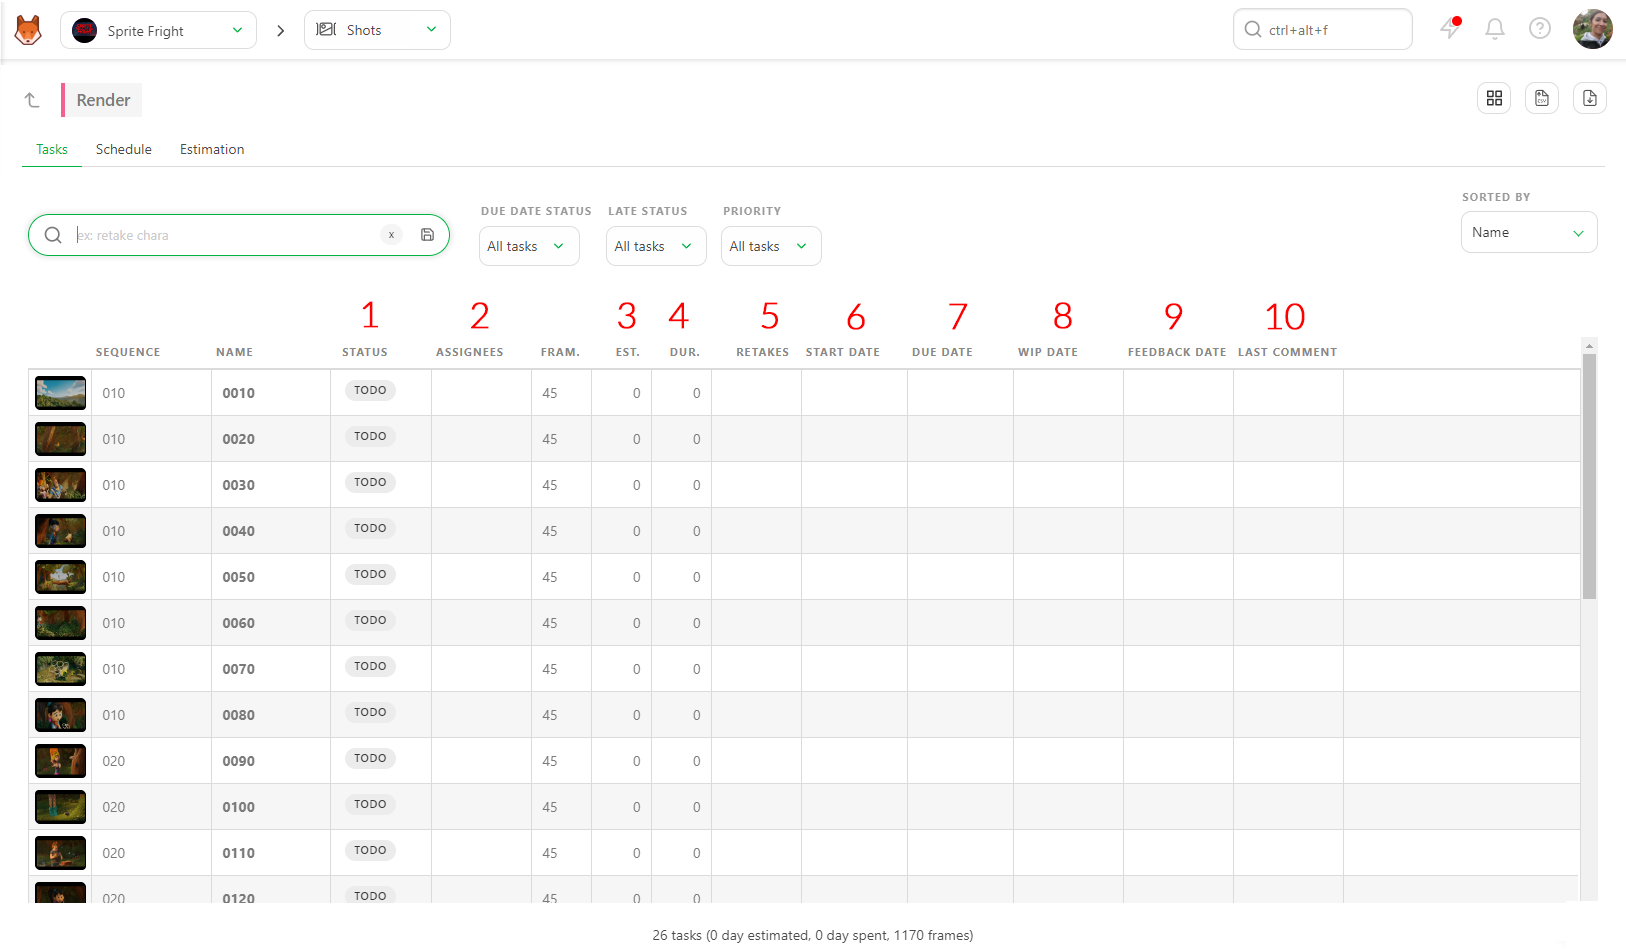
To go further in detail with the detailed Task type's view :
You can see and change the status of a task
You can assign people to tasks
You can add an estimation for the task (in day unit)
Kitsu calculates the sum of the timesheet fed by the artists
The number of back-and-forths with the retake status
You can add a start date for the task (with the calendar)
Kitsu calculates the due date with the Start Date and the estimation
the Wip and Feedback dates are automatically filled
The last comment section helps you keep an eye on the last activity of this task type.
# Forecast your team speed - Estimated Quotas
To help you set a correct estimation, you can use the Estimation Tab.
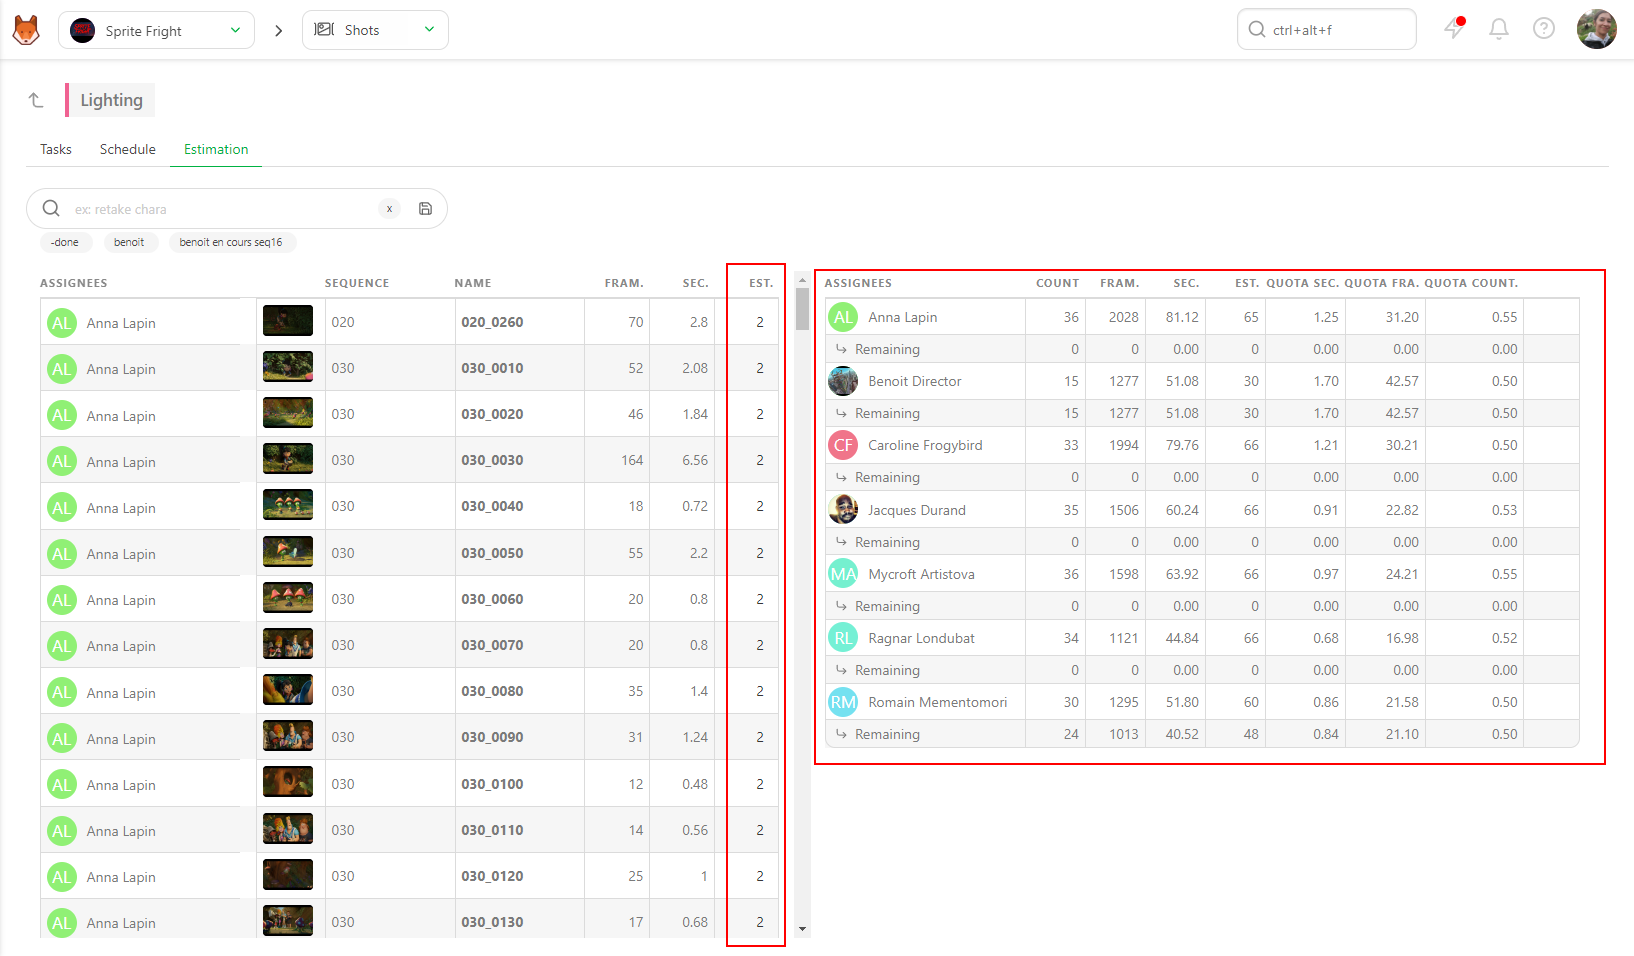
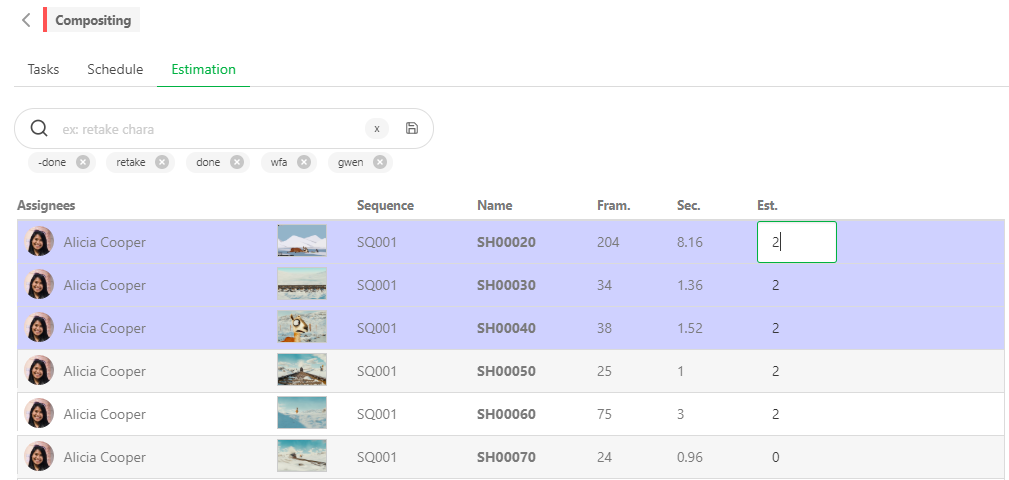
The left part of the screen lists the shots with the assignment and the number of frames (1). Depending on the FPS you have set for the production, the number of Seconds will be automatically calculated (2).
Definition
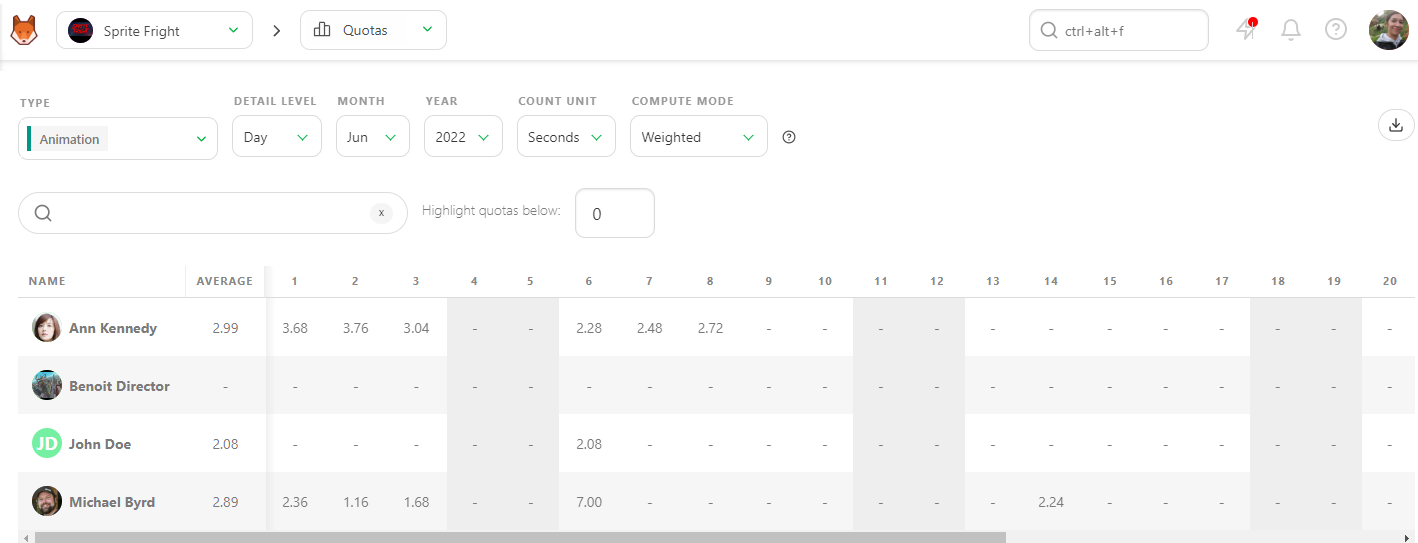
Quotas is a way to visualize your team speed.
You can see in average how many shots/frames or seconds the artist has to do daily to finish all the tasks with the estimated number of days.
On the right part of the screen, you can see the full department team (depending on the assignments you made), the number of shots they have to do, the number of frames and seconds, and the average Quota. You will also have the Remaining line, which gives you the actual situation of your team.
And the last column is the Estimation. To modify the estimation, hover the line with your mouse and click the editing zone.
You can also select multiple shots simultaneously to edit them all at once.
Every time you change the Estimation (in the number of days) on the right part, you can see that the Average Quota is updated in real time.
For more information about the Schedule tab, go to the Task Type Schedule
# Team real speed: Quotas
Kitsu has two ways to calculate the quotas per shot Task Type.
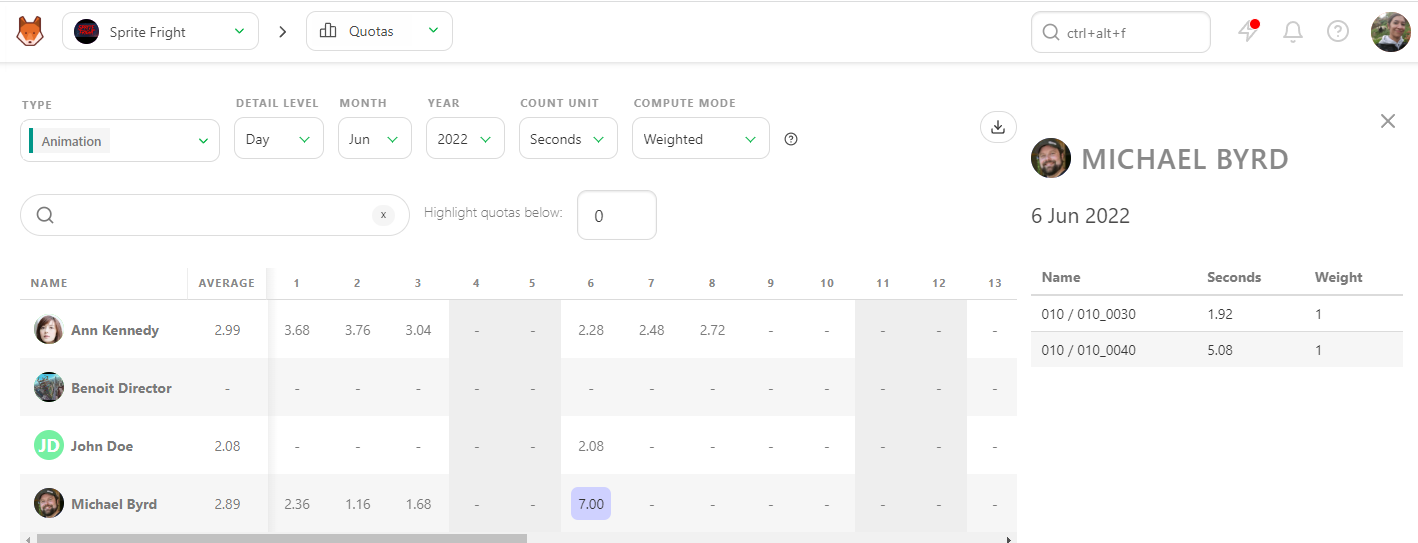
The first is linked to the timesheet : Shots are considered to have ended on the first feedback request. Then, quotas are weighted according to the time spent on the task (when the Artist fills out his timesheet).
In this example, Kitsu has weighted the daily quota linked to the timesheet.
If no timesheet is filled, then Kitsu considers that:
The task was started when the first status change was made to WIP.
The task was done the day the feedback request was made.
Kitsu will split the done frames among all business days between the start and the end and grab the number of frames (or seconds, or tasks) submitted per day/week/month per Artist.
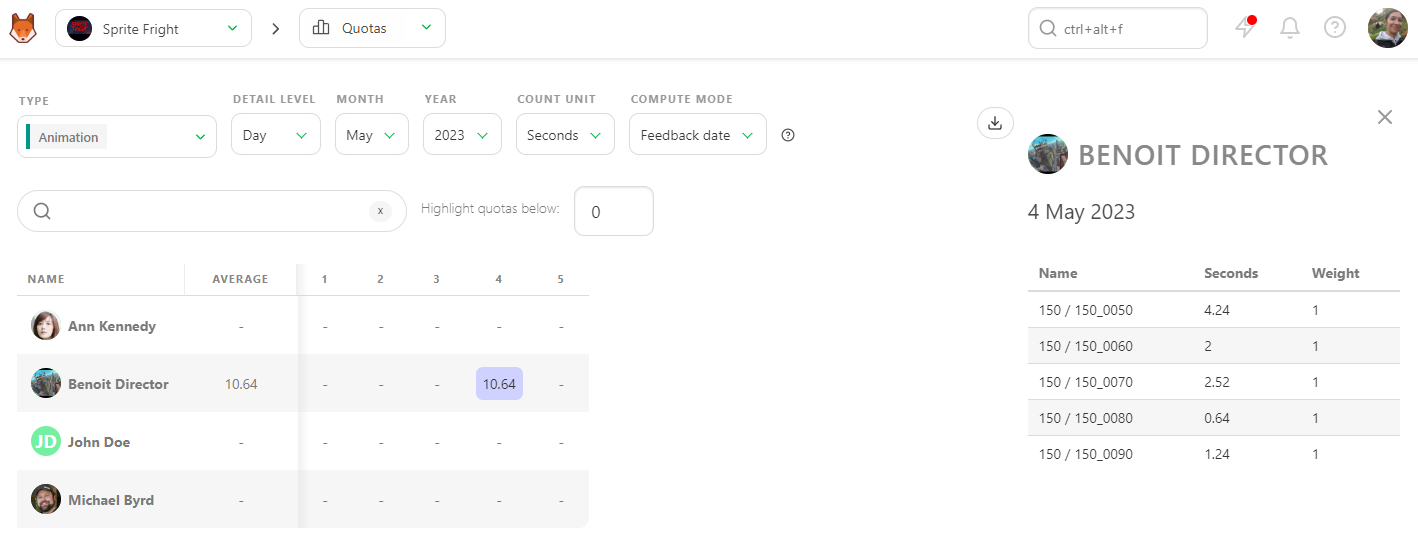
You can click on a number and see its details on the right panel anytime.
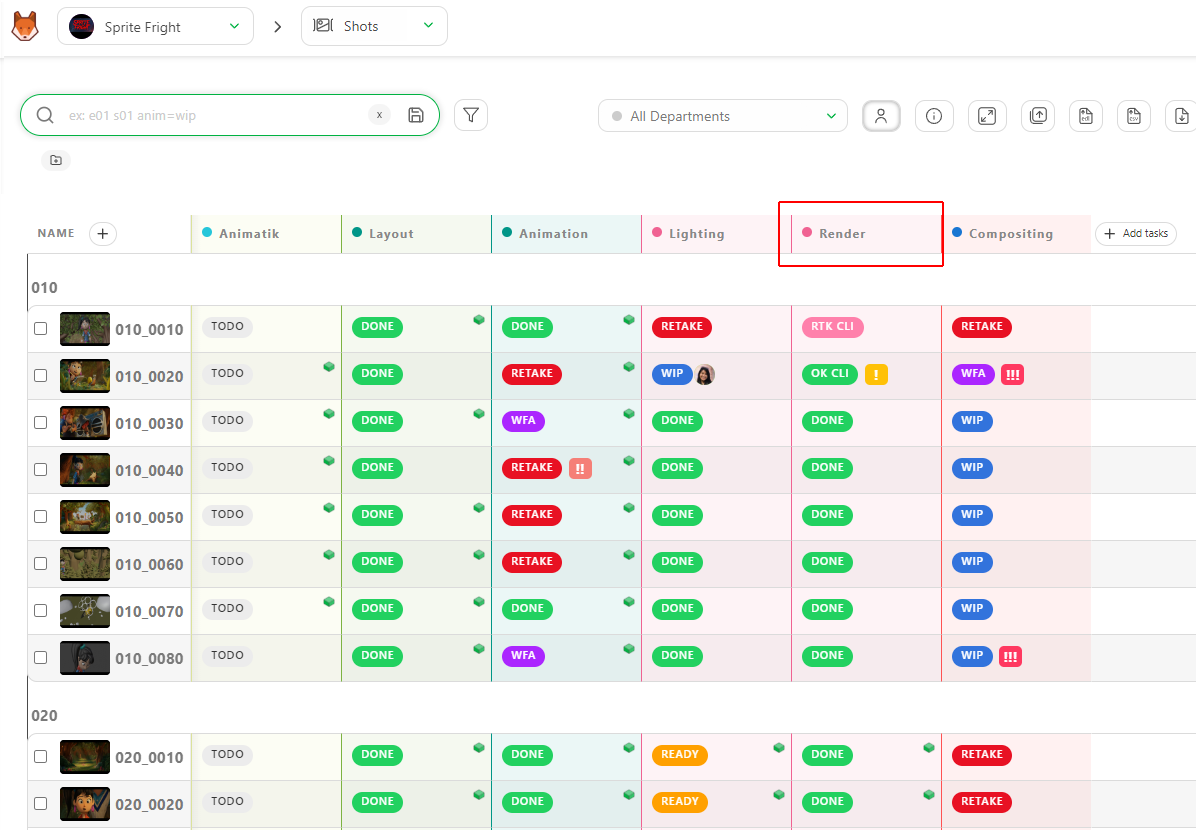
# Change Priorities
At some point in the production, you may want to prioritize some tasks and pinpoint these urgent tasks to your team.
For this, we use the same technique as before. Click on the space near a status task (1).

The action box appears.
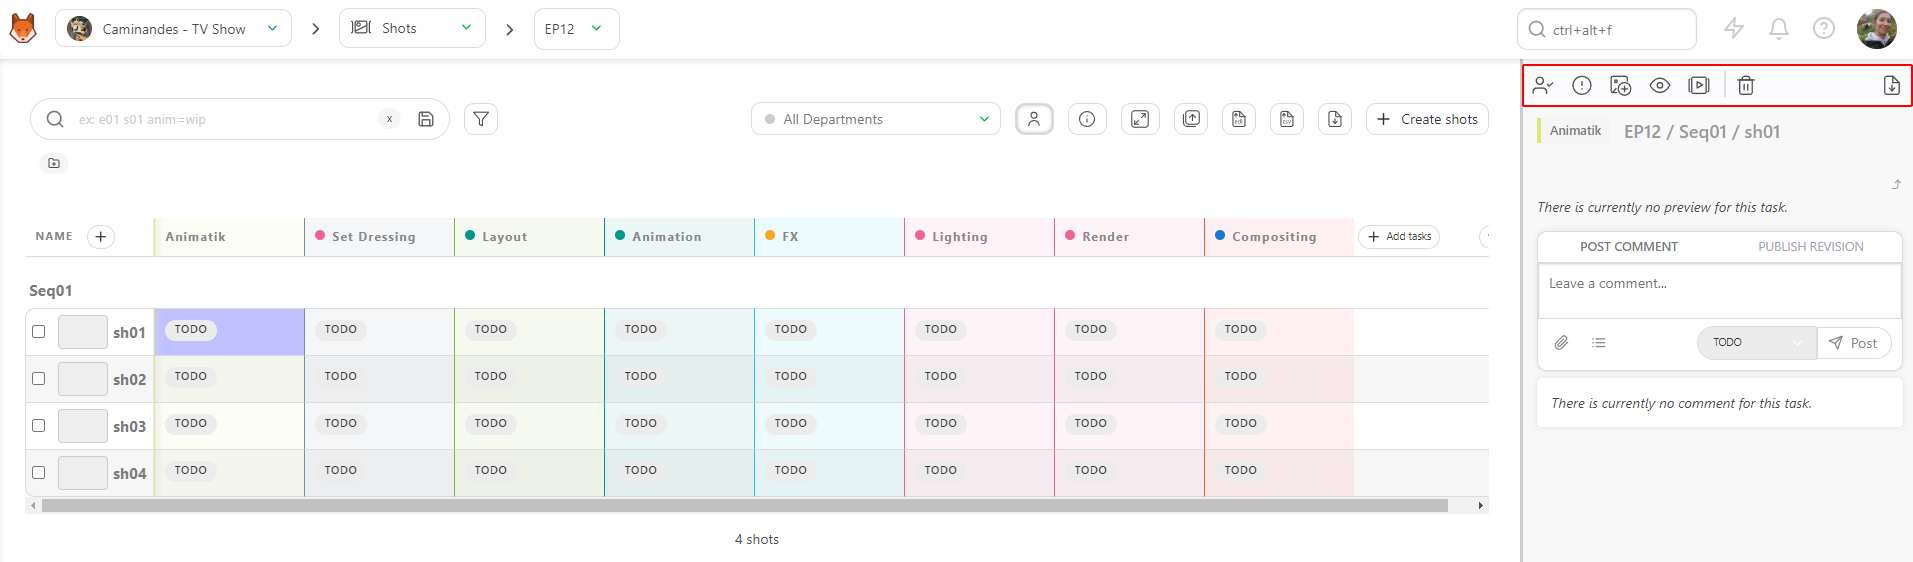
Click on the icon of the action menu to choose Change priority.

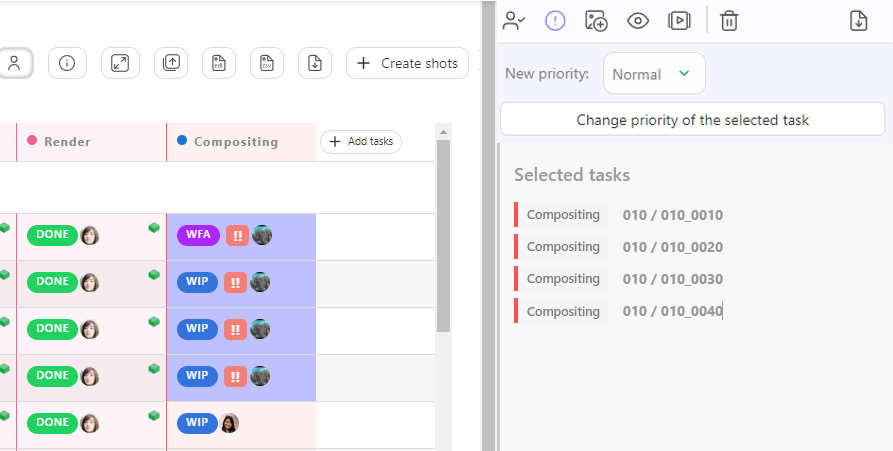
There are four levels of priority: Normal, which is the fundamental level of all the tasks High, Very High, or Emergency. Save the changes with the Confirm button.
As we have done for the assignation or the status, select the shots (1), select the level of priority (2), and apply with Confirm (3).
You can now see next to the status of the task some exclamation marks. The more there are, the more urgent the task is.
- (1) is Normal,
- (2) is High,
- (3) is Very High
- (4) is for Emergency.
